Have you ever pressed the “Send” button on an email and immediately regretted it? Perhaps you were in a hurry and forgot to include a file, sent it to someone other than who you intended, or spotted a typo as soon as you sent it. Don’t worry! If you use Microsoft Outlook, you can possibly recall that email and avoid embarrassment. This tutorial is for you—whether you are a student, professional, or simply new to Outlook.
We’re going to take you through each step of how to recall an email in Outlook, discuss when it is effective, provide tips on how to prevent email disaster, and even touch on tools such as spy apps for tracking emails in certain situations.
By the end of this article, you’ll feel confident about recalling emails, preventing mistakes, and understanding related tools. Let’s dive in!
What Does It Mean to Recall an Email?
Recalling an email in Outlook allows you to attempt to “take back” a message you’ve sent, provided the recipient hasn’t opened it yet. It’s kind of like unsending a text message—except more complicated when dealing with emails. When you recall an email, Outlook will try to remove the message from the recipient’s inbox or substitute it with a new message.
Why Would You Want to Recall an Email?
The following are some of the usual reasons that individuals attempt to recall emails:
- Typos or errors: You notice a spelling error or incorrect data.
- Wrong recipient: You sent the email to the wrong individual.
- Missing attachments: You did not attach that crucial file.
- Regretful content: You sent something off in a state of haste that you would rather not have.
Recalling an email can be a lifesaver, but it’s not always guaranteed. Let’s explore when it can be done.
Can You Recall an Email in Outlook? The Requirements
Before attempting to recall an email, you must determine if it’s even possible. Outlook’s recall feature only works within certain conditions. Here’s what you should check:
Conditions for Recalling an Email
- Both you and the recipient have to be using Outlook: The recall feature will work most effectively if both you and the recipient’s email accounts are hosted by Microsoft Exchange or Microsoft 365 in the same organization (such as a school or company).
- The email has to be unreaded: If the recipient already opened the email, the recall will fail.
- The message is still in the recipient’s Inbox: If moved to another folder (by hand or by rule), recall won’t succeed.
- You’re on the desktop version of Outlook: Recall typically isn’t present in Outlook’s web or mobile versions.
- No outside email services: If you sent it to a Gmail, Yahoo, or other non-Outlook address, recall won’t succeed.
Quick Checklist Before Recalling
Here is a quick table to see if you can remember your email:
| Requirement | Can Recall? |
|---|---|
| Both use Microsoft Exchange/365 (same org) | Yes |
| Email is unread | Yes |
| Email is in recipient’s Inbox | Yes |
| Using Outlook desktop application | Yes |
| Sent to Gmail/Yahoo/other non-Outlook email | No |
| Email already opened | No |
| Using Outlook web/mobile app | No |
If your situation meets these conditions, you’re ready to try recalling the email. Let’s get to the steps!
Step-by-Step Guide: How to Recall an Email in Outlook
Remembering an email in Outlook is easy if you can do the following. We’ll walk you through the instructions for the desktop version of Outlook (as recall is not supported by web and mobile versions). Let’s begin!
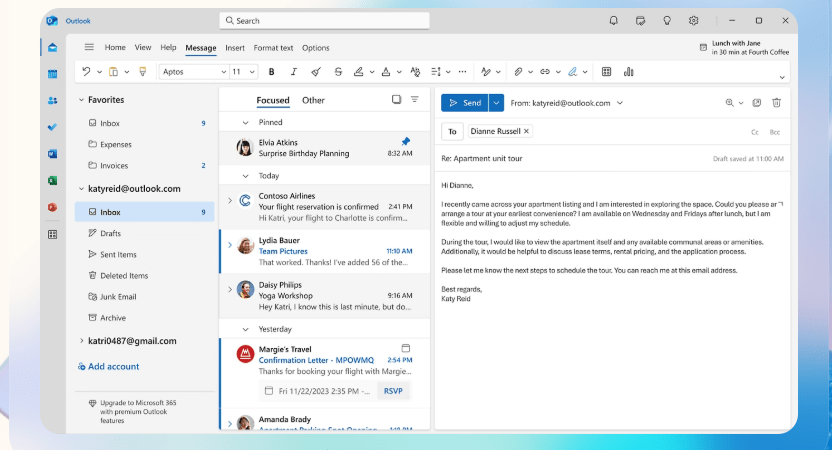
Step 1: Open Outlook and Go to Your Sent Items
- Open the desktop version of Outlook on your computer.
- On the left sidebar, click on the Sent Items folder. This contains all your sent emails.
- Locate the email that you wish to recall and double-click on it to open it in a new window. (Do not just click on it—double-click so that it opens completely.)
Step 2: Access the Recall Option
- In the email window, examine the toolbar at the top.
- Click on the File menu (top left).
- Click Info, then go to Message Resend and Recall.
- Select Recall This Message from the menu.
Note: If you don’t see “Recall This Message” available, it’s probably because your account doesn’t qualify (e.g., you’re not on Exchange/365 or you’re using the web version).
Step 3: Select Your Recall Option
When you choose “Recall This Message,” you’ll get a pop-up box with two choices:
- Delete unread copies of this message: This instructs Outlook to attempt to delete the email from the recipient’s inbox.
- Delete unread copies and replace with a new message: This allows you to delete the initial email and send a revised version in its place.
Choose according to your requirement. If you simply need to delete the email, use the first. If you need to correct something (such as including an attachment), use the second.
Step 4: Choose Notification
You will find a checkbox that reads, “Tell me if recall succeeds or fails for each recipient.” Select this checkbox if you would like Outlook to tell you whether the recall was successful. It is a good practice to leave this active so that you will be aware of the result.
Step 5: Confirm and Wait
- Press OK to initiate the recall process.
- If you decide to recall the email, an email window will appear. Edit your changes, and then hit Send to send the revised version.
- Wait for Outlook to let you know if the recall was a success or not. This may take some minutes, depending on your network.
Quick Tips for This Process
- Act quickly: The quicker you attempt to recall, the higher your chances, as the recipient hasn’t yet read the email.
- Verify your setup: Should the “Recall This Message” feature be unavailable, ensure you’re utilizing the Outlook desktop application and a Microsoft Exchange/365 account.
- Don’t count on it: Even if you do this, recall is not always successful. Always double-check emails before sending!
What Occurs When You Recall an Email?
After you’ve tried to recall an email, you may be curious about what occurs next. Here’s a summary of what might occur:
If the Recall Works
- The recipient’s inbox is cleared of the email (or substituted with your revised email).
- If notifications were turned on, you’ll receive a note from Outlook indicating, “Recall Success” for that recipient.
- The recipient will not be aware that you attempted to recall the email (unless you substituted it with another one).
If the Recall Fails
- The original email remains in the recipient’s inbox.
- You’ll receive a “Recall Failure” message (if you checked the notification box).
- Typical reasons for failure:
- The email was already read.
- The recipient has a non-Outlook email client (such as Gmail).
- The email was reassigned to a different folder.
What the Recipient Sees
- If the recall does not work and the email remains in their inbox, the recipient may also receive a message indicating you attempted to recall the email. This is a little embarrassing, so be ready!
- If you exchanged the email with a new one, they will see the new version (assuming the recall succeeded).
A Word of Caution
Reminding yourself of an email can sometimes warn the recipient of your error, particularly if the recall does not work. If you are concerned about this, you may wish to send a brief apology message in addition to recall.
Why Email Recall May Not Always Work
Although Outlook’s email recall facility is useful, it is not infallible. These are a few reasons why it may let you down:
- Technical Limitations: Recall can only work within the same Microsoft Exchange/365 installation. If the recipient has another email system, forget it.
- Timing: If the recipient opens the email before your recall request is processed, too bad.
- Recipient’s Settings: If they have automatic email rules setup to store emails in folders, recall cannot pull the email back.
- Human Behavior: A few individuals have preview emails or notifications that reveal the email content before it’s technically “opened,” which avoids recall.
Due to these constraints, it’s always preferable to avoid email blunders than to depend on recall. Let’s discuss how to avoid the necessity of recalling an email.
How to Avoid Needing to Recall Emails
Prevention is better than a cure, isn’t it? Here are some tips that help you send emails confidently and minimize the likelihood of having to recall them:
1. Double-Check Before Sending
- Check recipients: Make sure the email is intended for the correct individual. Carefully check the “To,” “Cc,” and “Bcc” fields.
- Proofread: Read your email for typos, grammatical errors, and tone. Reading out loud may be able to pick up errors.
- Check attachments: Verify you’ve attached the right documents and that they are the correct versions.
2. Utilize Outlook’s Delay Send Feature
A feature in Outlook allows you to delay sending an email for a few seconds or minutes after you click “Send.” This provides a short window of time to cancel the email if you see an error. Here’s how to configure it:
- Head to File > Manage Rules & Alerts.
- Click New Rule and choose Apply rule on messages I send.
- Bypass conditions to apply to all emails, then click Next.
- Check defer delivery by a number of minutes and specify a delay (e.g., 2 minutes).
- Click OK to save.
Now, whenever you send an email, it’ll remain in your Outbox for the designated time, allowing you to edit or delete it.
3. Save Drafts for Important Emails
If you’re writing an important email, don’t rush to send it. Save it as a draft, take a break, and review it later with fresh eyes. To save a draft, click Save in the email window or close it, and Outlook will save it to your Drafts folder.
4. Use Templates for Repetitive Emails
If you’re sending such emails frequently (such as project updates), make a template in Outlook to minimize mistakes. Visit New Email > File > Save As > Outlook Template. This maintains uniformity and saves time.
5. Watch Out for “Reply All”
“Reply All” can cause emails sent to the wrong recipients by accident. Before you reply to a group mail, see who’s in the recipient list so you don’t share sensitive information.
Can Spy Apps Help Monitor Emails in Outlook?
Adding a subsection on spy apps to the article on remembering emails in Outlook might not be natural, since the two subjects are not related. The article is on email management and Outlook operation, whereas spy apps deal with tracking device usage, usually for parental control or spying. Adding spy apps might break the flow of the article and cause readers expecting a comprehensive guide to remembering emails to get confused. But if you wish to include spy apps, it must be included with care so that it is kept relevant and valuable to readers, maybe by linking it to email spying in certain situations.
Sometimes, you may need to monitor emails sent or received via Outlook, particularly if you are a parent or an employer who wants to assure safety or productivity. Spy apps, commonly sold as parental control or staff monitoring software, are able to monitor things such as emails, messages, and app use on a device. But can they do the job on Outlook emails, and are they useful? Let’s take a look.
What Are Spy Apps?
Spy apps are computer programs that record activity on a smartphone or computer. They’re commonly employed by parents who want to monitor their children’s online activity or employers wanting to keep company devices under surveillance. mSpy, uMobix, FlexiSPY and Xnspy are some of the most popular spy apps, capable of tracking calls, messages, social media, and even emails.
How Spy Apps Work with Outlook
Some spy apps can track emails that have been sent or received via the Outlook app or desktop application. Here’s what they can do:
- Monitor email content: They log the body, subject, and recipient of emails sent in Outlook.
- Monitor attachments: They can display whether files were sent or received.
- Log timestamps: You can view when emails were opened or sent.
- Retrieve deleted emails: Sophisticated apps such as uMobix can occasionally recover deleted messages.
For instance, mSpy will track emails on an Android or iOS phone, and indicate the content and parties involved, provided that you have the app installed on the device that is to be monitored.
When Would You Ever Use Spy Apps?
Spy apps are generally reserved for these situations:
- Parental control: To confirm that children are not sharing confidential information or chatting with strangers through email.
- Employee monitoring: To check if employees are using company email appropriately (with consent).
- Device safety: To detect suspicious activity, like phishing emails opened in Outlook.
Important Considerations
Before using a spy app, keep these points in mind:
- Legality: It’s usually legal to monitor devices you own, like your child’s phone or a company computer, but installing spy apps on someone else’s device without consent (e.g., a partner’s phone) is illegal in many places. Always check local laws.
- Ethics: Even if legal, monitoring someone without their knowledge can harm trust. Be transparent when possible, especially with employees or older teens.
- Privacy threats: Certain spy apps are flawed in terms of security, which may allow hackers to get access to your information or even the data of the monitored device. Type popular apps such as Qustodio or mSpy, which are checked for safety.
- Installation requirements: Most spy apps must be installed directly on the monitored device, involving physical access. Some, such as mSpy, are not fully functional without rooting (Android) or jailbreaking (iOS), which may invalidate warranties.
Should You Use a Spy App for Outlook?
Spy apps have their use in certain situations, such as to protect your child, but they are not a substitute for honest communication or good email etiquette. If you are thinking about using a spy app:
- Think carefully: Find apps with free trials and try out features.
- Use responsibly: Notify users (e.g., employees) if tracking company devices.
- Pair with prevention: Educate employees or children about secure email practices to minimize the necessity for surveillance.
If you’re still unclear, ask a technical professional or attorney for guidance so you can make proper use of these resources.
Other Solutions to Recall an Email
What do you do when you cannot recall an email, or recall is unsuccessful? Worry not—there are some other measures to deal with the issue gracefully:
1. Send a Follow-Up Email
If you erred, send a respectful follow-up to rectify it. e.g.,
Subject: Correction to My Previous Email
Hi [Name], I realized a tiny mistake in my previous email. [Mention briefly, e.g., “I didn’t attach the report.”] Here’s the corrected version/attachment. Please understand!
Best, [Your Name]
2. Apologize If Necessary
If you sent something embarrassing or in error, a simple apology can make a big difference. Keep it brief and professional:
Subject: Apology for My Last Email
Hi [Name], Sorry for any confusion my last email may have caused. [Briefly state why]. Please let me know if you have any questions.
Thanks, [Your Name]
3. Use Third-Party Email Tools
Certain email add-ons (such as Boomerang or Mailtrack) provide features such as unsending messages or scheduling. These might not always be fully compatible with Outlook, though, so research first.

4. Contact IT Support
You accidentally sent a sensitive email (such as confidential company details), contact your school or workplace IT staff right away. They may have special tools to recover or address the situation.
5. Learn from the Mistake
Each email mishap is a chance to improve. Take a moment to reflect on what went wrong—did you rush? Miss a detail? Use this to build better habits, like setting up email rules or using templates.
Fun Tip: How to Test Outlook Recall Safely
Want to get some practice at recalling emails without risking an actual blunder? Here’s a fun tip to test the recall feature:
- Set up a second email account (such as a temporary one in Outlook in your organization).
- Send yourself a test email from your primary account to this second account.
- Attempt to recall the email using the above steps.
- Look into the second account’s inbox to verify if the recall succeeded.
This allows you to familiarize yourself with the procedure without annoying anyone else!
Conclusion: Master Your Outlook Emails with Confidence
Recalling an email in Outlook can spare you those “oops” moments, but it’s not always sure to succeed. By following the steps in this guide—checking requirements, acting quickly, and using the desktop app—you’ll have the best chance of pulling back that email. To avoid needing recalls, double-check recipients, proofread carefully, and use tools like Outlook’s delay send feature. If you’re considering monitoring emails for safety (like for kids or employees), spy apps like mSpy or Qustodio can help, but use them ethically and legally.
Mistakes happen, but with the right tools and habits, you can minimize them. Whether you’re fixing a typo, preventing a mix-up, or exploring monitoring options, this guide equips you to handle Outlook like a pro. Stay confident, stay organized, and keep those emails on point!
FAQs Around Recalling Emails in Outlook
1. Is it possible to recall an email sent through Outlook to a Gmail address?
No, recall via email only functions if the recipient and sender both have a Microsoft Exchange or Microsoft 365 account within the same organization. Other external providers like Gmail do not support Outlook’s recall function.
2. What if the recipient opens the message before I recall it?
If the email has already been read, the recall won’t work, and the email remains in their inbox. You’ll receive a “Recall Failure” alert if you’ve enabled it.
3. Can I recall an email via the Outlook mobile app?
No, the recall option exists solely within the Outlook desktop app and not in web or mobile apps.
4. Are spy apps secure to use for tracking Outlook emails?
Reputable spy apps like Qustodio or mSpy are generally safe but can have security risks, like data leaks. Always research the app, use it legally, and ensure you have consent where required.
5. How can I prevent needing to recall emails in the future?
Double-check recipients and content, use Outlook’s delay send feature, save drafts for important emails, and create templates for repetitive messages to reduce errors.
Related Articles:
1:Trusted Programs That Track iMessage Quietly
2: The Truth Revealed: How to Recover Snapchat Messages (Even Old Ones)
3: Detect Fake Instagram DMs: The Ultimate Surveillance Apps
4: Track My Child’s Phone Location: A Parent’s Guide to Safety and Peace of Mind
5: Cloud-Based Phone Monitoring Apps: Track Anytime, Anywhere